
The complete guide
How To Choose And Fit A Bendable Curtain Track
The problem with straight rails in rooms that are not straight
Curtain hardware is built around an assumption that most homes quietly break. The assumption is that a window is a flat rectangle on a flat wall, so a straight rod will cover it.
Walk around and count how often that is actually true. A bay window turns two corners. A camper van window curves with the body of the vehicle. A shower sits in an alcove with a pillar in the way. A studio flat needs a curtain to wrap around a bed, not just cross in front of it.
The usual fix is to buy several short rails and join them with corner connectors. It works, after a fashion, but you get gaps at every joint, light leaks through those gaps, and the curtain snags each time it crosses a join. You also end up with more brackets, more screws and more measuring.
A bendable curtain track takes a different route. One piece of rail, shaped by hand, following whatever line the room gives you.
How the flexible track actually works
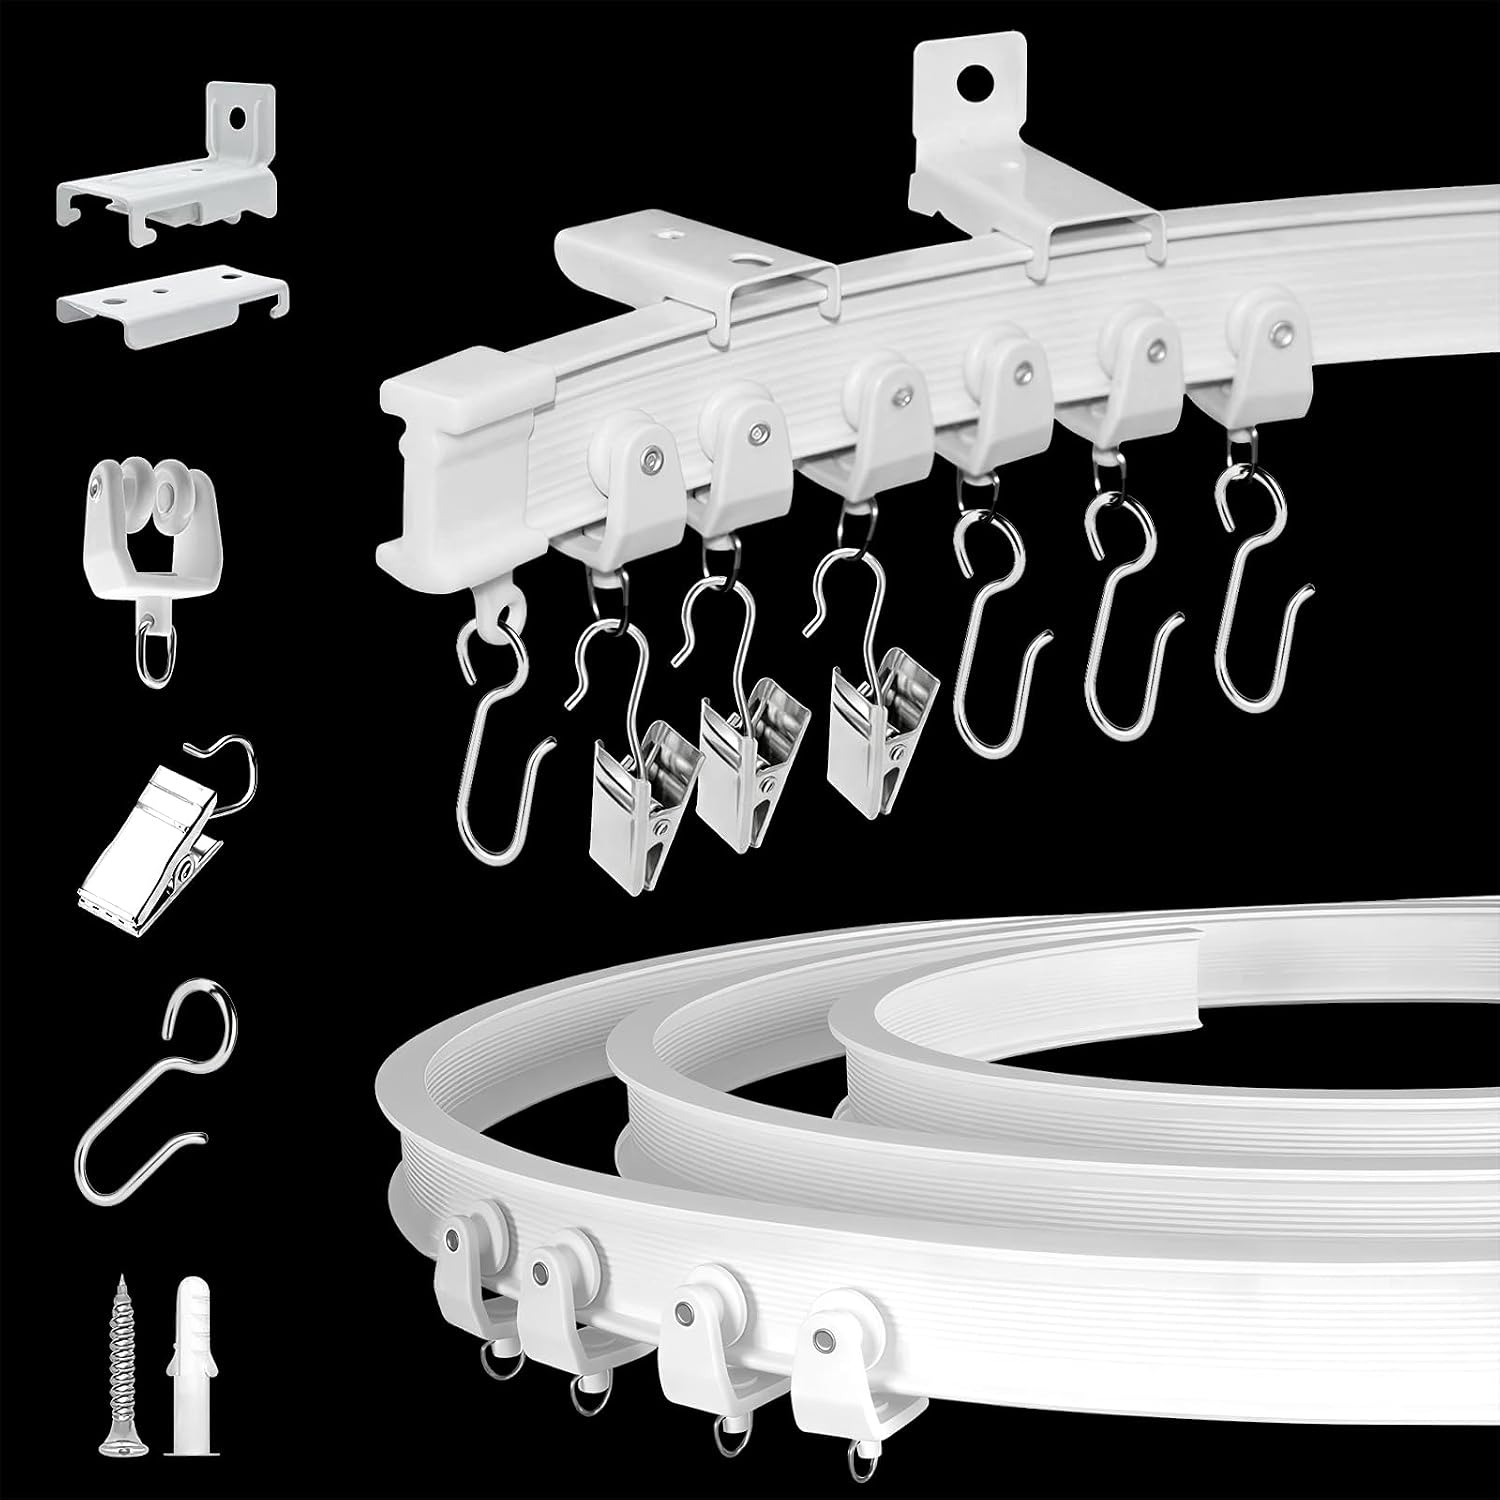
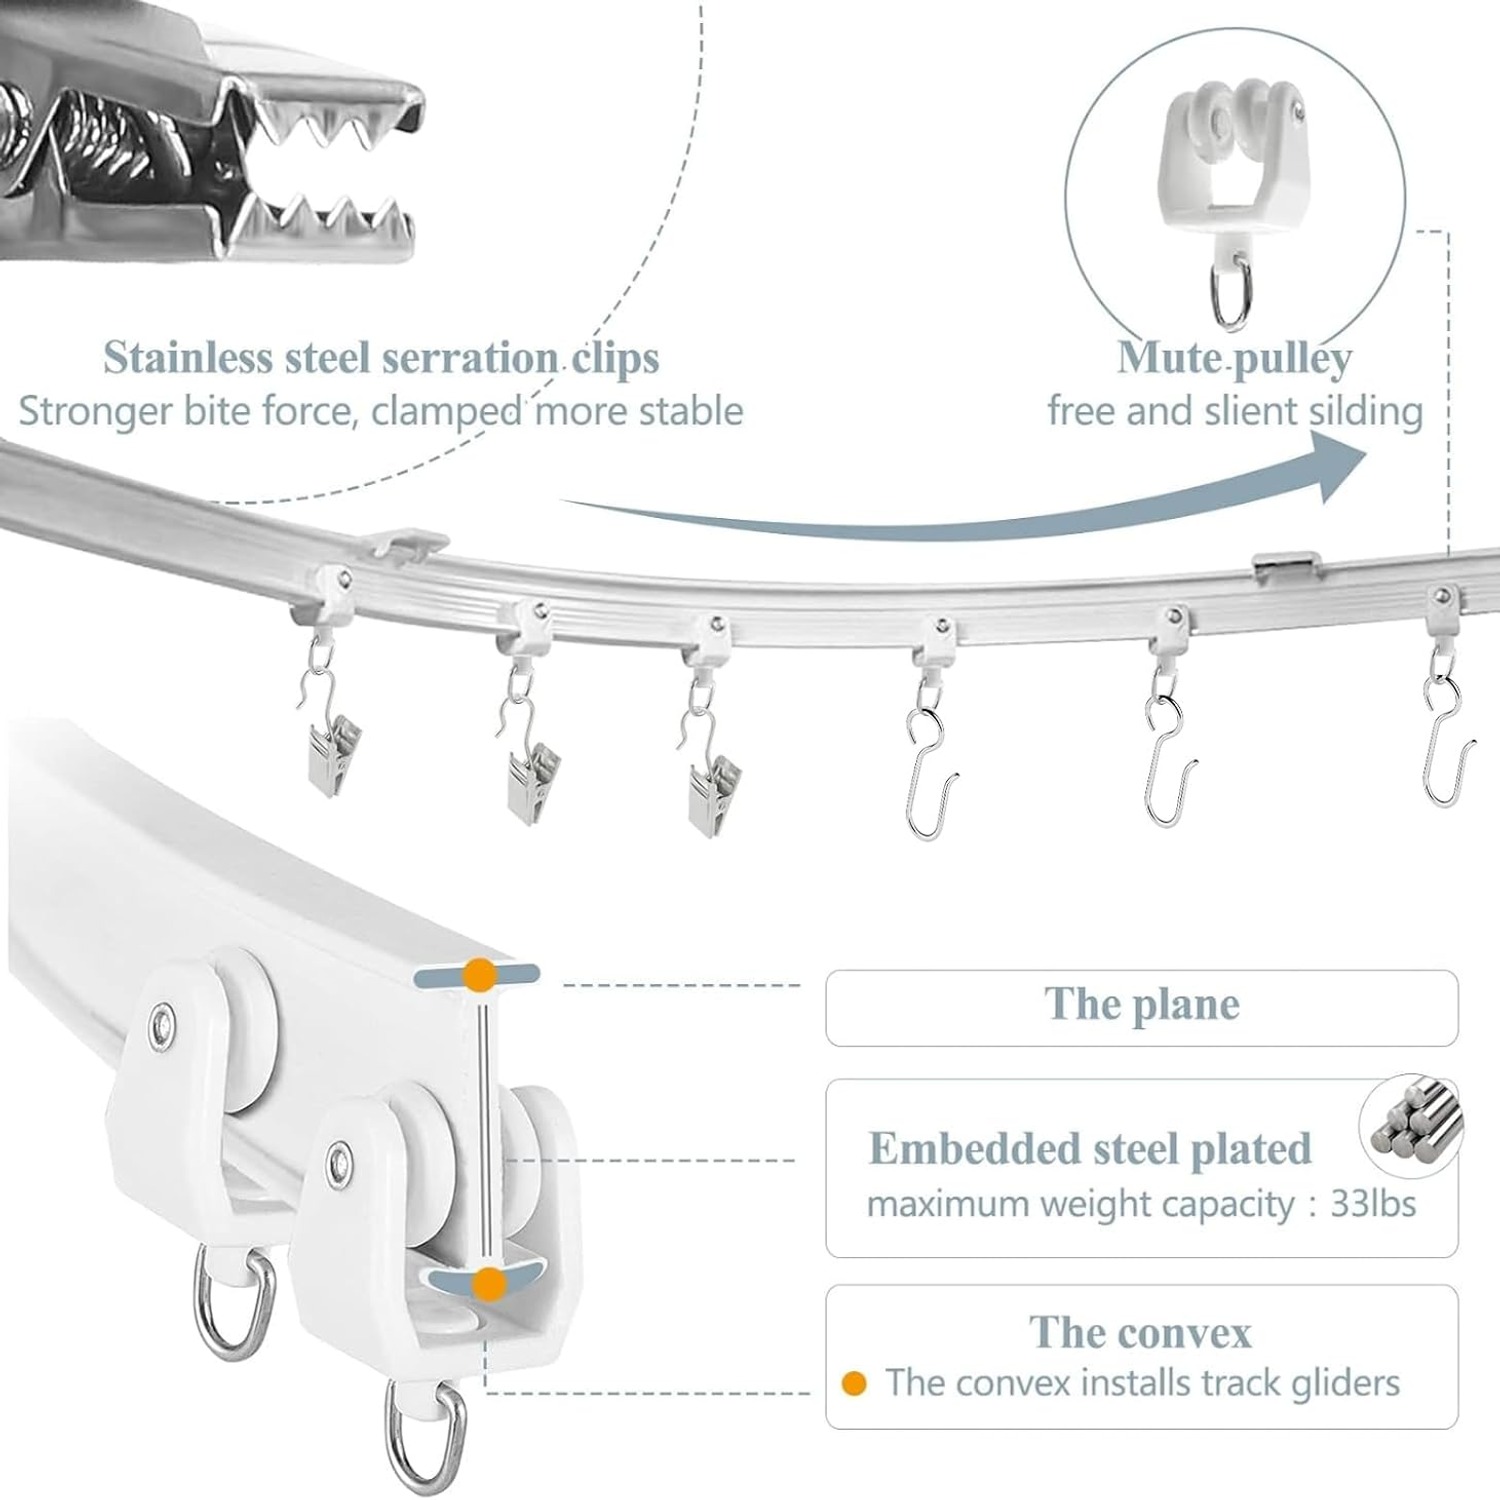
The rail here is plastic with a metal plate embedded along its length. That pairing is the whole trick.
Plastic on its own is springy. Bend it and it tries to return to straight, which is useless when you want a curve to hold. A solid metal rail is the opposite problem: it will bend, but it kinks at the bend point and the channel inside deforms so the rollers jam.
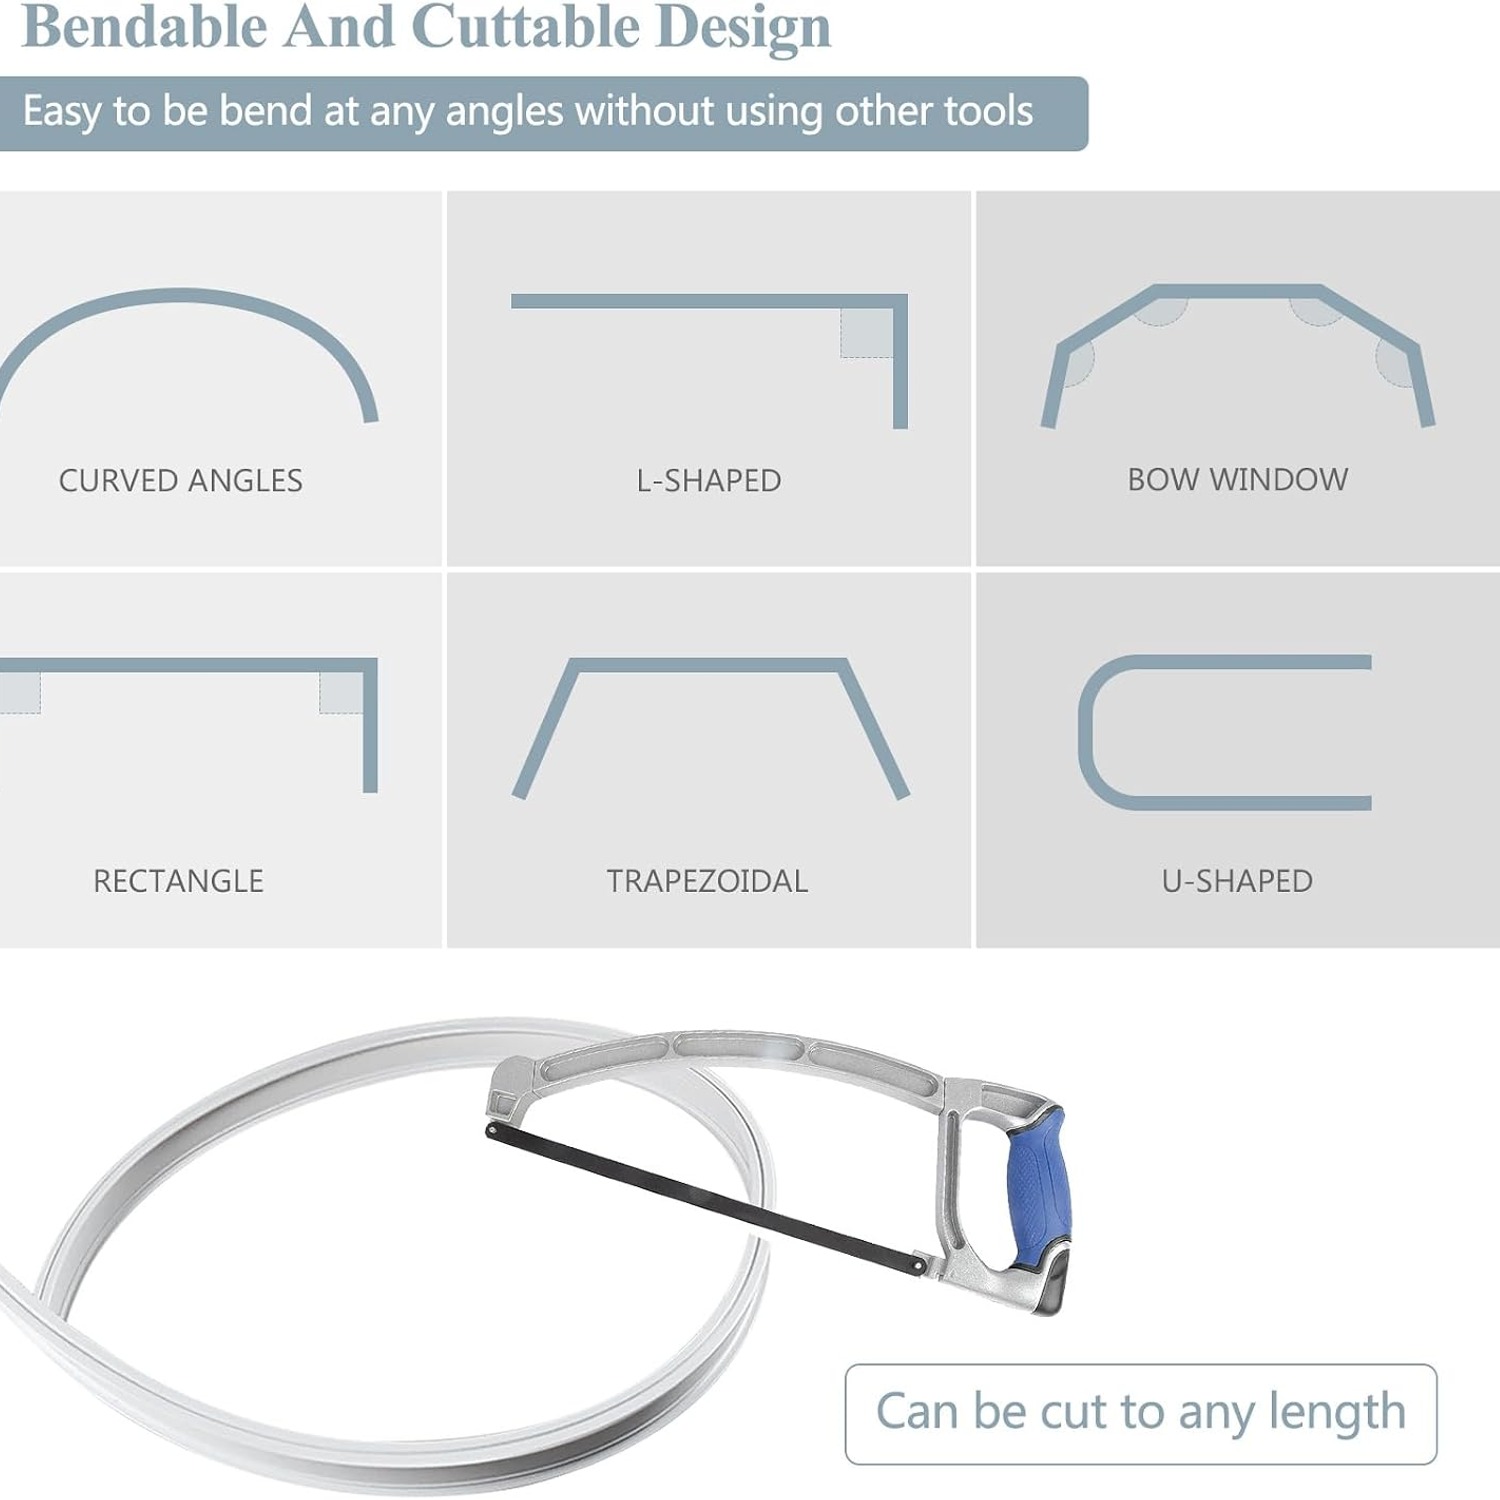
Put a thin metal plate inside a plastic body and you get something that bends under hand pressure and then stays where you put it, while the plastic keeps the channel its proper shape. That is why this style of rail can handle an L shape, a U shape, a trapezoid or a bow window in one run.
Inside the channel sit small rollers. Each roller carries a stainless steel clip with a saw-tooth edge. The teeth bite the fabric and hold it, which means no sewn tape, no eyelets and no hooks. You can clip up a curtain you already own, a shower liner, a photography backdrop or a plain bedsheet.
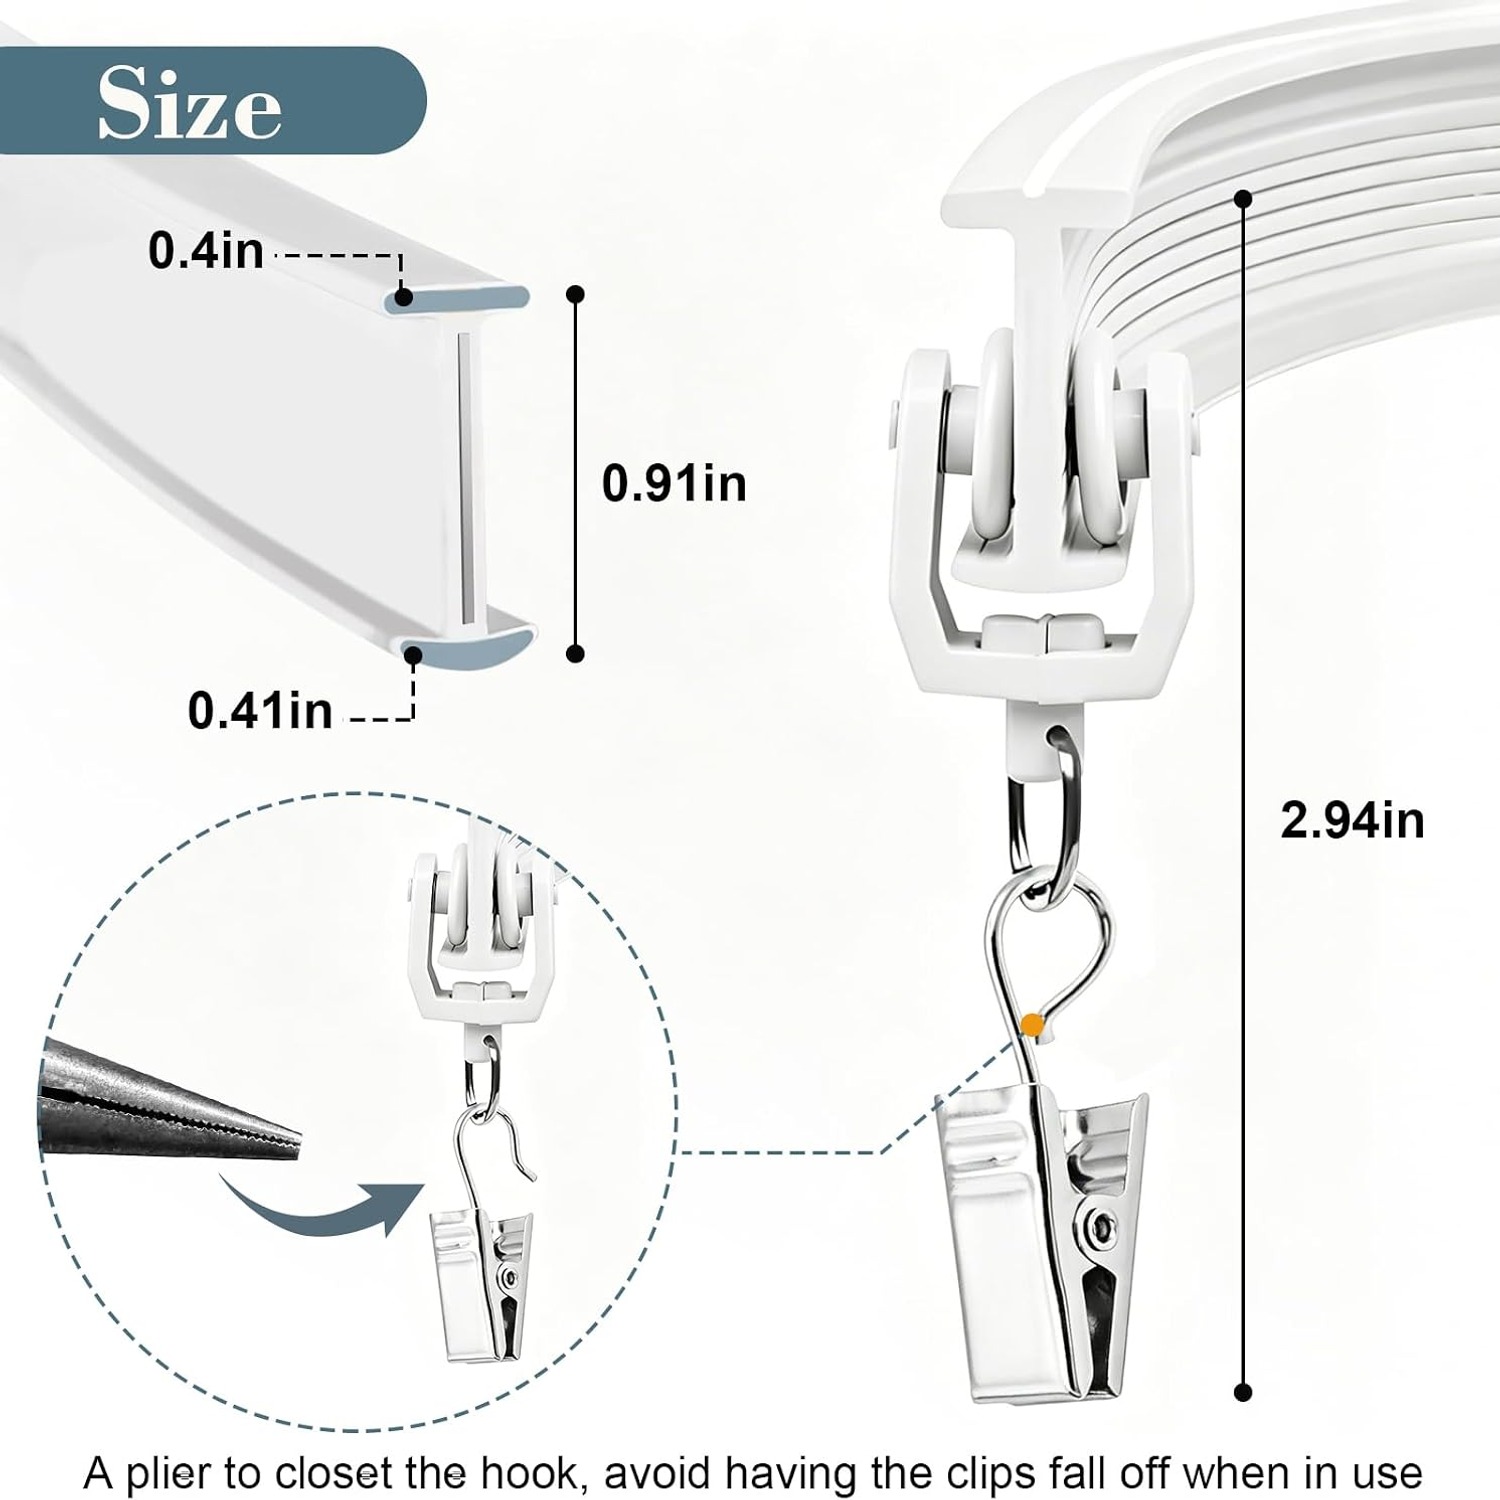
The track in this kit is 12 feet long, about 0.39 inches wide, and white. The whole item weighs 0.9 kg, and the stated maximum weight recommendation is also 0.9 kg, so this is a rail for light to medium curtain panels rather than heavy lined drapes.
Who this suits
RV and camper owners. This is probably the single most common use. Vehicle walls curve, interior space is tight, and a chunky rod eats headroom. A low-profile flexible rail follows the wall and tucks close to the ceiling. If you are hunting for the best rv curtain track for a conversion, flexibility matters more than almost anything else.
People with bay or bow windows. One continuous rail across all three faces beats three separate rods. The curtain travels the full width without snagging, and you lose the light gaps at the angles.
Renters and flat-sharers. A ceiling-mounted curtain is the quickest way to split one room into two usable spaces. Screw holes in a ceiling are small and easy to fill later. Many people looking for the best room divider curtain track end up here for exactly that reason.
Anyone with an awkward wet area. Corner baths and odd-shaped shower alcoves rarely suit a straight rod. A curved rail wraps around them.
Studios and set-ups that need a backdrop. A sweeping curve of fabric behind a camera is easy to hang on a track like this and easy to move later.
Working out what you need before you order
Start with a tape measure and the actual path you want the curtain to travel, not the width of the window. On a bay, that means measuring each face and adding them together. On a room divider, measure the full span plus any amount you want the curtain to stack clear at the ends.
Add a little extra to that total. You want the track slightly longer than the covered area so the curtain can bunch to one side without blocking the view. If your total comes out under 12 feet, you can trim the rail down with a fine tooth hacksaw. If it comes out over, you would need a second kit.
Next, look up. What is the ceiling made of? This is the part people skip and regret.
Timber joists or solid battens are ideal, because the supplied screws will bite properly. Drywall, drywall and suspended tile ceilings will not hold a curtain on screws alone. You need expansion anchors rated for the material, and sometimes longer screws to reach something solid behind. Buy those before installation day rather than halfway through it.
Then check the curtain itself. Weigh it if you can. Keep within the stated recommendation and spread the fabric across plenty of clips so no single point takes the strain.
Fitting it without the frustration
The track arrives rolled, because that keeps the parcel small and the shipping sensible. Your first job is to let it relax.
Unroll it and lay it out flat for a while. Where it still curls, bend it gently in the opposite direction at the crease. Do it in several light passes rather than one hard bend. This part rewards patience more than force, and rushing it is the most common cause of a wavy-looking finished run.
Mark your bracket positions with a pencil and a level before you pick up a drill. On straight sections, space brackets evenly. Through any curve, bring them closer together. Curves need more support, both to hold the shape and to keep the channel aligned so rollers do not catch.
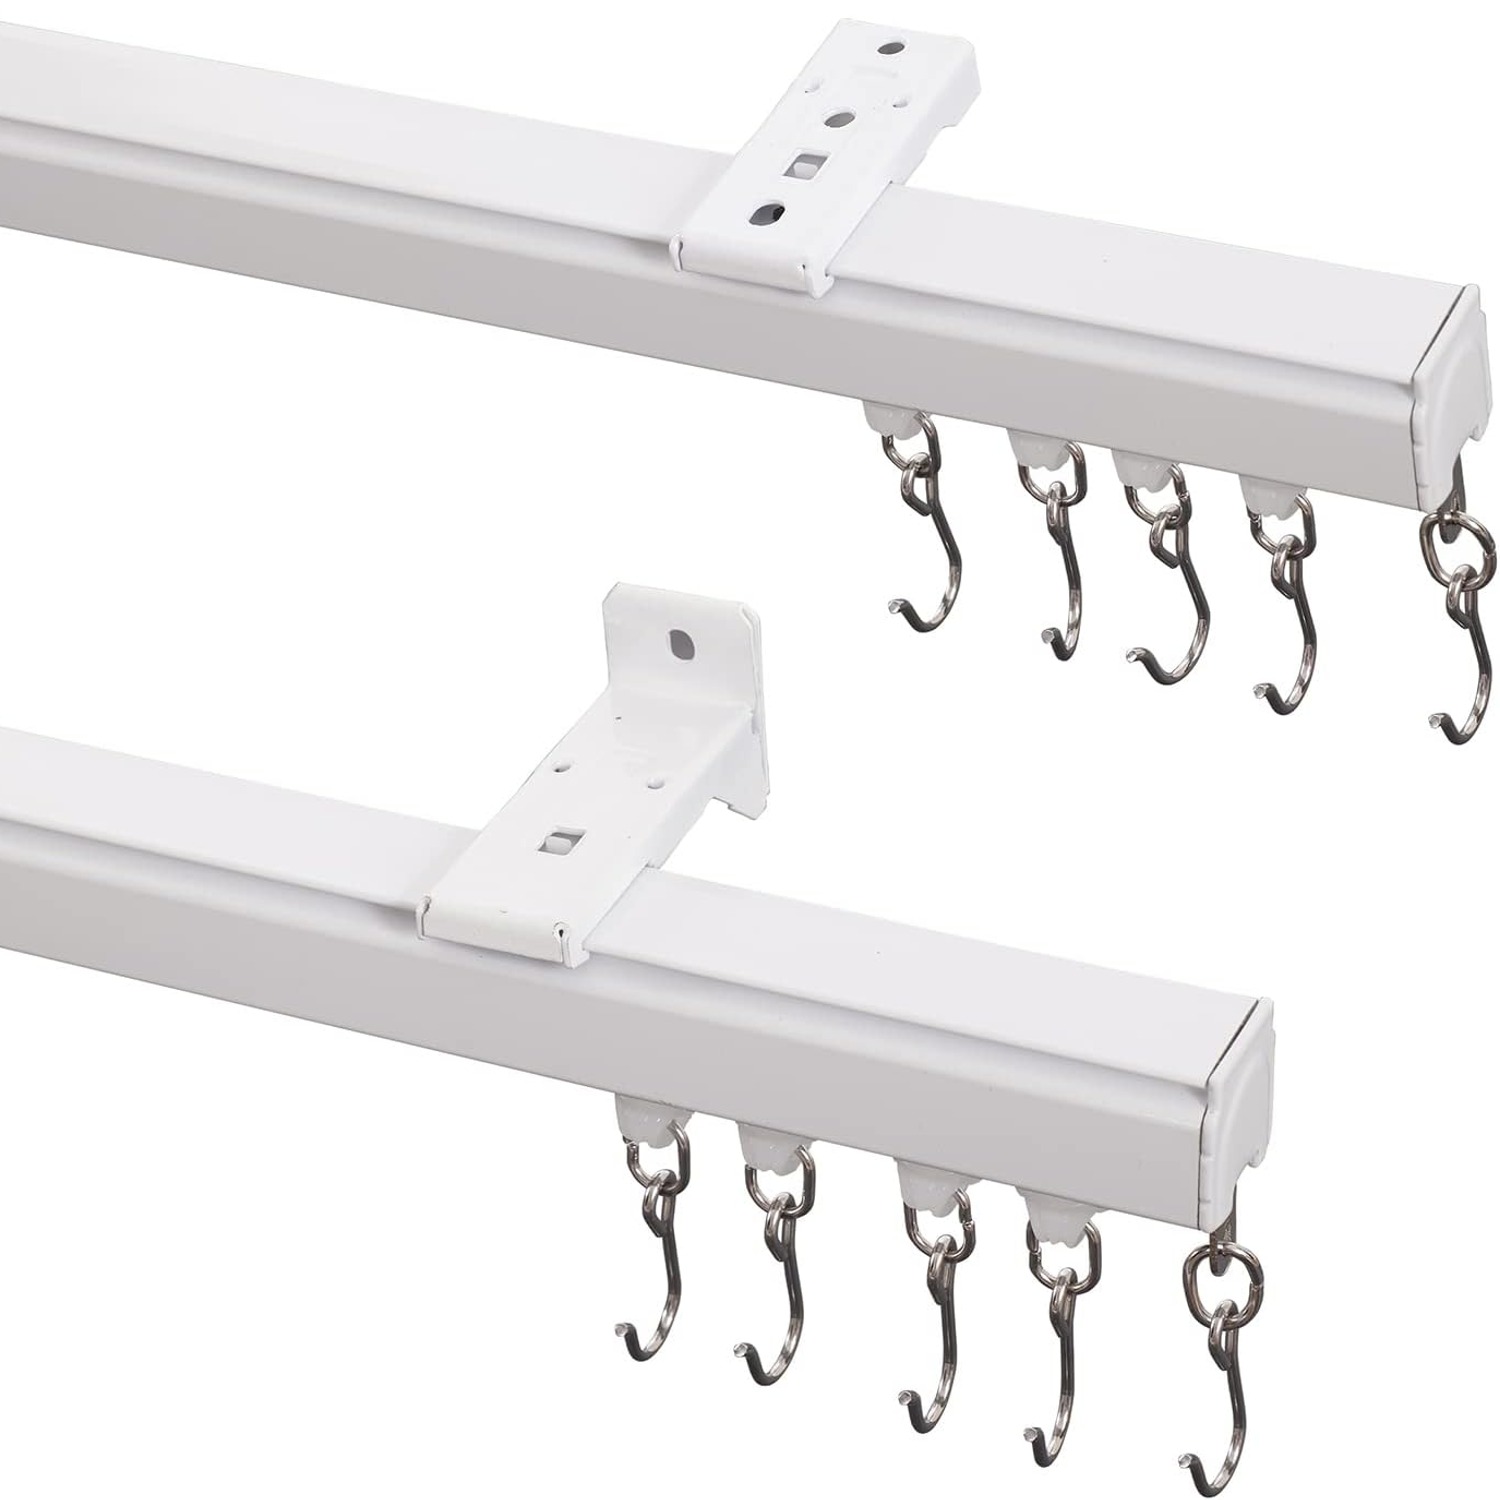
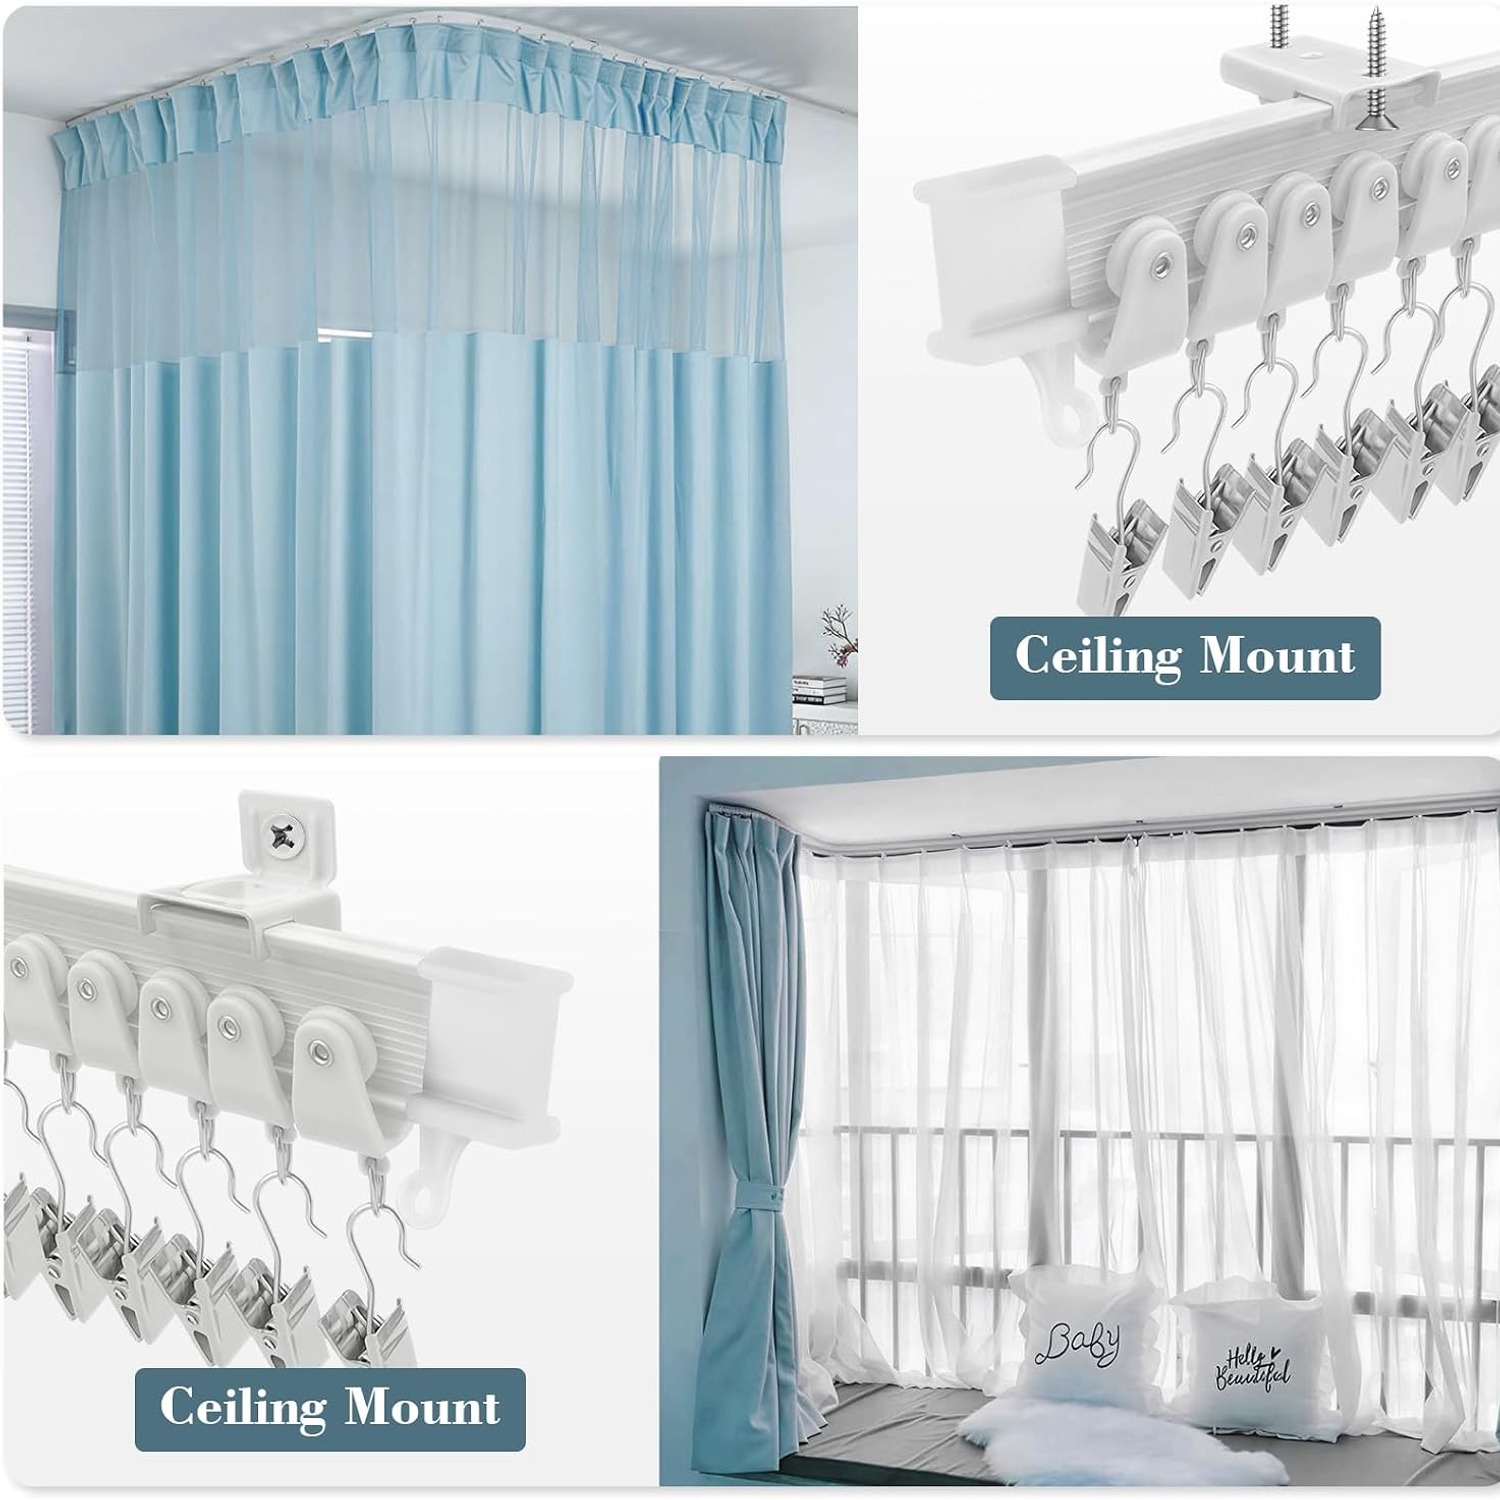
Decide on ceiling or wall mounting for each section. Both bracket types are in the box. Ceiling mounting is the usual choice for dividers, shower curtains and privacy screens. Wall mounting is often better in an RV, where the ceiling panel may be thin or already full of wiring and fittings.
Fix the brackets, then snap the rail into them, working from one end to the other. Shape as you go. Load the rollers before you snap in the final section, since threading them on afterwards is fiddly.
Finally, hang the curtain and run it end to end a few times. Any sticking point usually means a bracket is pinching the rail or a cut edge needs smoothing.
Keeping it running well
Maintenance is light. Wipe the rail with a damp cloth and mild soap now and then, then dry it. Skip bleach, solvents and abrasive pads, which will mark the plastic.
The one thing that genuinely affects performance is dust in the channel. Lint and grit build up and the rollers start to drag. A quick pass with a dry cloth or a vacuum nozzle usually fixes it.
Resist the urge to oil anything. Oil grabs dust and the problem comes back worse in a month. If cleaning alone does not restore the glide, a light dry silicone spray is the gentler option.
In a vehicle, check the bracket screws once or twice a year. Road vibration loosens fixings over time, and a loose bracket puts an odd bend into the rail.
The short version
If your window or your room is not a straight line, a bendable rail saves you money, time and the ugly joints that come with cobbling straight rods together. This one is 12 feet of plastic rail with a metal plate inside, white, light at 0.9 kg, and it bends into L shapes, U shapes, trapezoids and bow curves.
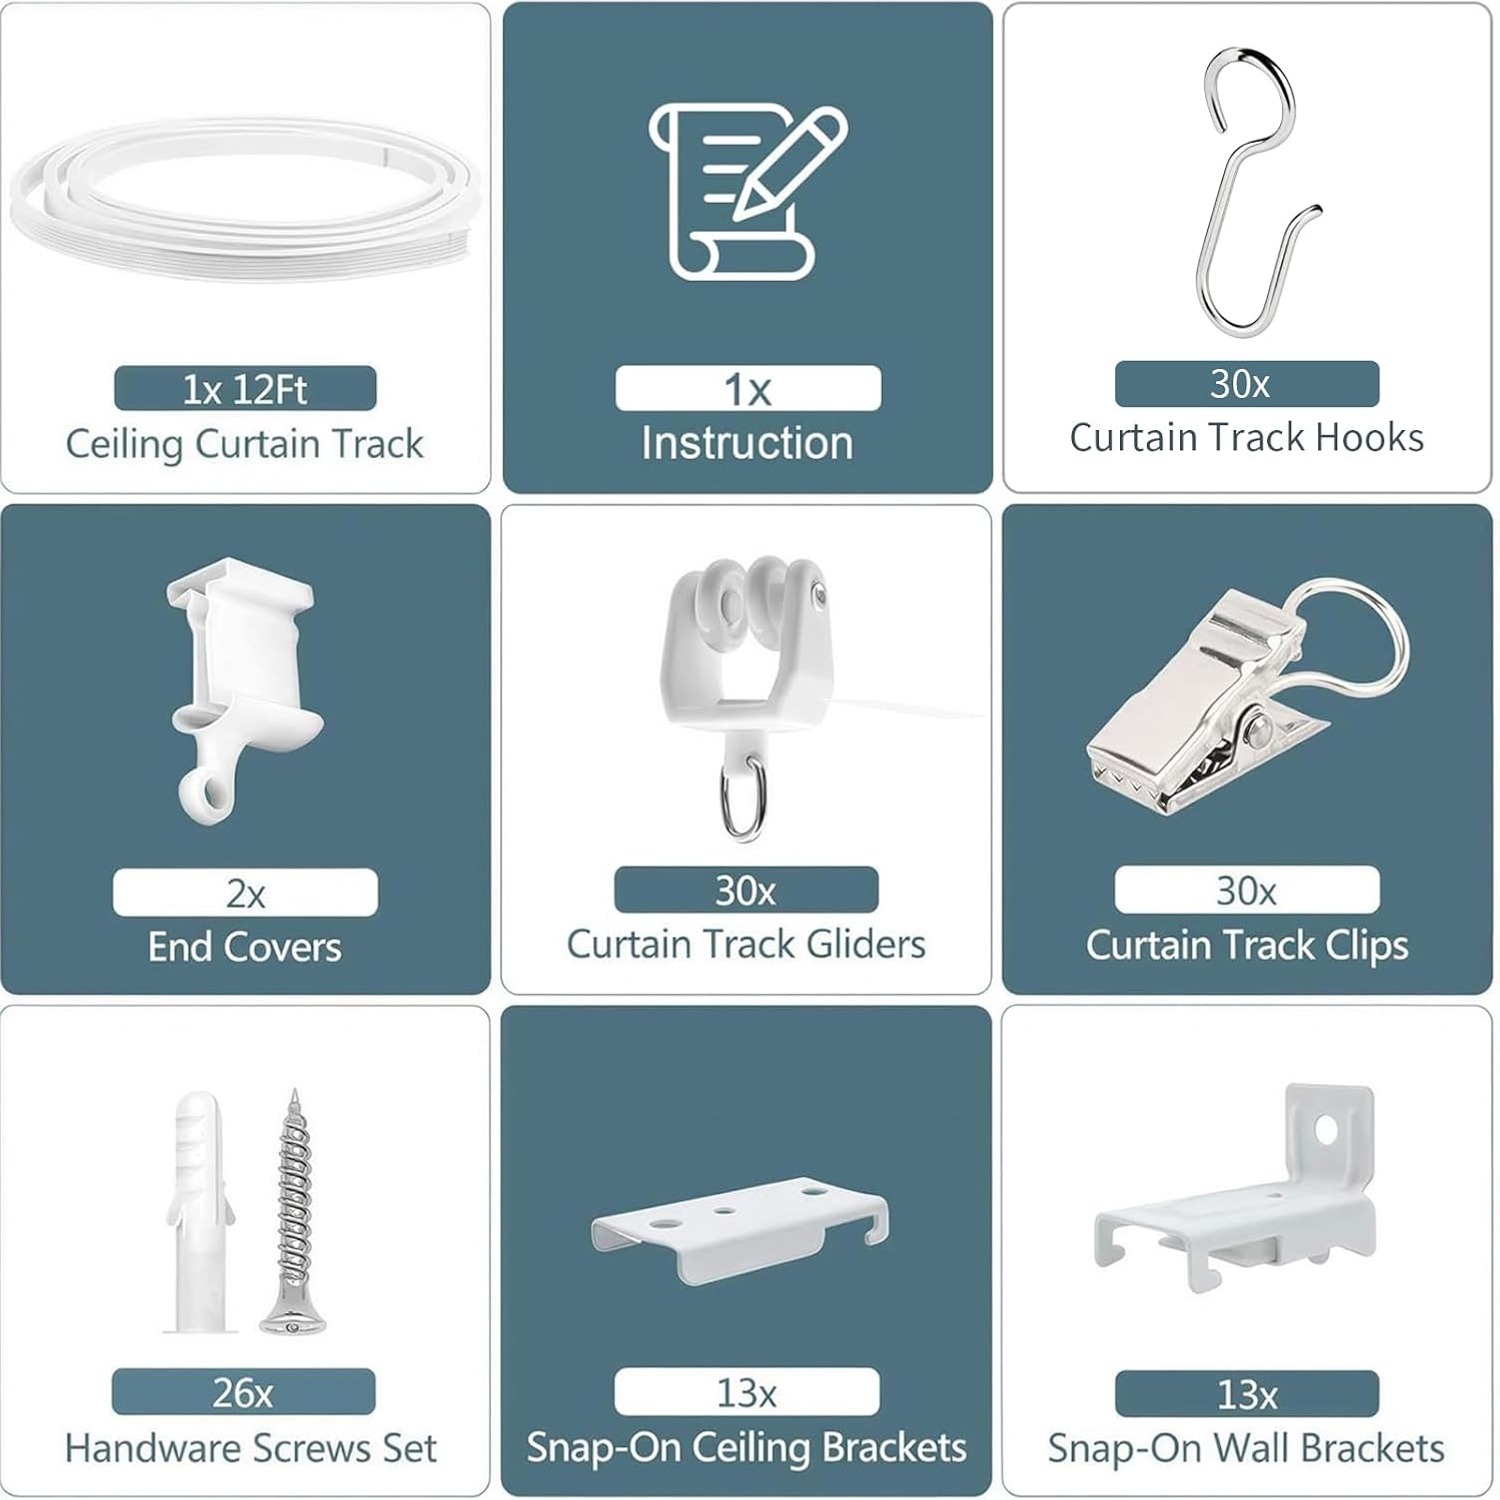
It comes with everything to hang a curtain straight away: rollers, saw-tooth steel clips, ceiling brackets and wall brackets. It can be cut shorter with a hacksaw. Its weight recommendation is 0.9 kg, so pick lighter panels.
The only real homework is checking what your ceiling or wall is made of and buying the right anchors if it is drywall or a drop ceiling. Get that part right and the rest is a straightforward afternoon job.